Tested: Maple Walnut Blondie, Orange Chocolate Cookie, Molasses Cookie, Chocolate Chip Cookie, Cranberry Oatmeal, Double Chocolate Brownie.
Courser Farm Kitchen a little home based business located about 2 hours north of me in Warner, New Hampshire. I love supporting small local business and though they aren’t super local to me, they are local enough! I will definitely be placing orders in the future for these super awesome treats! They make cookies, brownies, bars, blondies and breads that are all gluten free and vegan! They also take special orders for cakes and cupcakes!
When I got the little box of heaven in the mail from Emma it may as well have been Christmas! I ripped it open and took a few nibbles of a few of the products but found the strength to wrap them back up (well, almost all of them…) and wait for my neighbor to be available to come taste test with me since he is gf. We had a blast eating them. The goodies we got to try were the Chocolate Chip Cookie, Cranberry Oatmeal Cookie, Orange Chocolate Cookie, Molasses Cookie, Double Chocolate Brownie and the Maple Walnut Blondie!
I am a sucker for Cranberry Oatmeal cookies so those were definitely my favorite, I just wish they had a little more cranberry in them. But then again, I always almost double the amount of cranberries in the recipe I use… The cookie was nice and chewy and perfectly spiced. The Chocolate Chip was pretty fantastic too, it reminded me of the Cookie Crisp cereal I used to eat when I was a kid. It would have been perfect dipped in an ice cold glass of almond milk. Molasses cookies rock my socks in general so it’s no surprise this one was another winner! Give me chewy cookies or give me death! The dark sweetness of the molasses with the gentle hint of ginger really made me wish I had a whole truckload of these bad boys.
Now, I am very against combining chocolate with fruit flavors like cherry, orange, raspberry, etc etc, but I was extremely surprised at how much I liked the Orange Chocolate Cookie. It is a chocolate cookie with chocolate chips with a touch of orange, which was the perfect amount for me. It actually has me rethinking my hatred (yeah, really) of fruit flavored chocolate. I wouldn’t say that I’m a convert, but I’m going to be more open minded about it. See what a good product can do?! Speaking of good products, Double Chocolate Brownies? Hell to the yes! Fudgy, chewy and wicked chocolatey? The brownie was so good it didn’t last long enough to be photographed!
New England is pretty awesome to begin with, but the fact that we have the best of the best maple syrups makes it that much better. And that is exactly what you get with the Maple Walnut Blondie. New Hampshire maple syrup in a cake like little bar sprinkled with walnut chunks. Are you salivating yet?
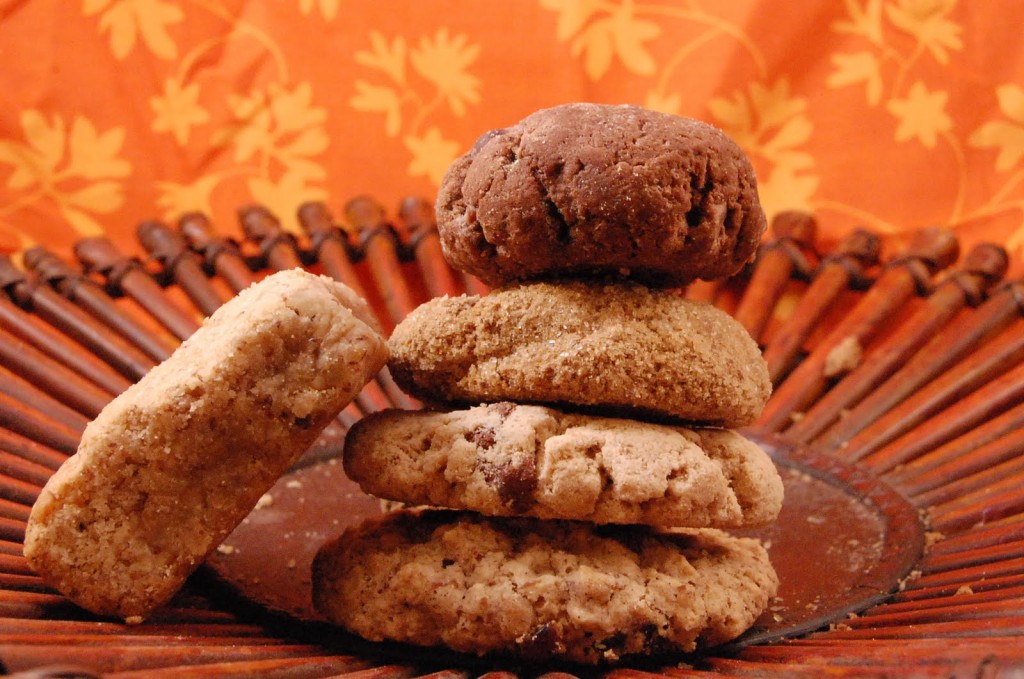
(Left: Maple Walnut Blondie. From Top to Bottom: Orange Chocolate Cookie, Molasses Cookie, Chocolate Chip Cookie, Cranberry Oatmeal. Not photographed: Double Chocolate Brownie. I inhaled it.)
Course Farm Kitchen sells there goods at a few local cafes and farmers markets, if you live in the New Hampshire area, or happen to be passing through, definitely stop by any of the places listed on their to grab some! If you don’t live in the area, get your butt over here and order some! What are you waiting for?!
Pros:
- Homemade.
- Local (sort of to me).
- Delicious!
Cons:
- None. Seriously.

Reviewed by Liz Whitaker
Ashley brings us zucchini bread just in time for those epic days filled with holiday baking!
Bean’s Pecan Pie Bars are not only delightful looking, but they’re soy-free, too. What’s not to love?
Hannah’s green garlic dip is sure to be a hit at holiday parties.
When life gives you lots of leftover mashed potatoes you can follow The Sunny Vegan’s lead and make mashed potato soup. Brilliant!
Cassie’s two bean meatless loaf looks like serious comfort food for a those cold winter evenings.
You guys, roasted onions stuffed with curried black quinoa!
While we’re talking about quinoa, Tina shows us how to make her quinoa cabbage rolls. So yum!
Anja’s seaweed sesame crackers look perfect for enjoying with nut cheezes, dips and a glass of wine (or two!).
And just because you can never have too many awesome cupcake recipes. :)
]]> Today’s blog post is brought to you by our friend, Julie Hasson. Not only does Julie write mad-awesome cookbooks, she also cooks mad-awesome food at Native Bowl, a food cart in Portland, OR (with tons of xgfx options). If you’re in the market for free vegan cooking videos, she’s got them on her site Everyday Dish TV. Keep on eye on Julie’s projects, folks–she’s been working on a lot of xgfx recipes lately. Thanks for your contribution to MoFo, Julie!
**************
My love affair started like any other. I found myself thinking about him non-stop, watching him from afar, trying to picture our beautiful life together.
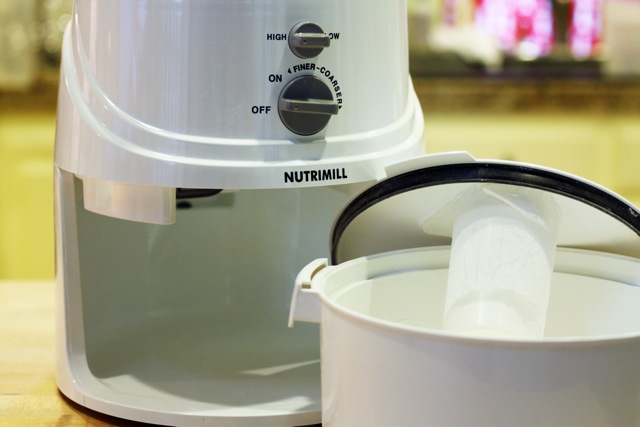
Eventually I gave in to temptation. I knew it was meant to be. That was a day that forever changed my life. That was the day that I brought a Nutrimill home.
In case you wondering what a Nutrimill is, I’ll tell you. It’s a fabulous machine that takes whole grains and beans and turns them into silky flour. It is an incredible boon to the gluten-free kitchen, especially if you use a lot of rice, quinoa, corn, millet, buckwheat and sorghum flours.
It’s extremely easy to use, and is well designed so that the hopper is nestled right in the center of the machine. You simply turn it on, and begin milling. Beyond the fabulous rice and grain flours, the bean and lentil flours are amazing too. I find myself making savory red lentil pancakes for breakfast, with no effort at all. You can also make black bean and split pea flours, for quick cooking soups or white bean flour to use as a healthy, high protein thickener. How cool is that? I don’t know about you, but I haven’t seen red lentil flour in the grocery store. And I love knowing that I can easily grind myself a batch whenever the mood strikes me.
The machine is not small, so if lack of space is an issue (and really, don’t we all have that problem?), you may want to make some room in your linen closet as I have. Hopefully you have an understanding spouse, who adores you so much that they’re happy to overlook the kitchen spill-over into the rest of the house.
I can honestly tell you that I’ve used this machine over and over and truly love it. I love having the control over the freshness of my flours, as well as the savings. I buy all of my grains and beans in bulk, so the flours are very inexpensive to make.
Do you want to know what I love best about this baby? It’s the assurance of knowing that all of the flours I grind in this mill are gluten-free, especially if you start with certified gluten-free grains from a reputable company like Bob’s Red Mill. You have total control over your flours, and that’s something you can feel good about.
]]>
This post is brought to us by the only gal I know of who combines karaoke with awesome homemade vegan and gluten free eats! Give it up for Rachel from VGFK, everyone!
Over at Vegan Gluten Free Karaoke my mission is simple: make delicious vegan and gluten free food while lip synching to pop music in ridiculous outfits. Past triumphs have included Lady Gaga Spring Rolls and Since U Been Gone Lasagna. The Bieber Beans were also pretty irresistible, if I say so myself.
I’ve been stoked about this guest post all month and decided to do a little experimentation with ice cream for Halloween. Those of you from colder climes may not find ice cream seasonally appropriate, but here in New Orleans where we have enjoyed temperatures in the 70′s and 80′s for the past few weeks, I thought it would be perfectly appropriate to combine rich fall flavors with this chilly treat.
I decided to make a Candy Corn Napoleon: instead of chocolate/vanilla/strawberry I created the white/orange/yellow color scheme of candy corn with a tahini/pumpkin/ginger combo in three layers. These were all flavors that I made up on the fly without a recipe, so it was quite the experiment.
I have been obsessed with cashew cream in ice cream lately, which is so rich and creamy that it comes out more like frozen custard. The base for each flavor is cashew cream which is made by soaking cashews in hot water for 5 minutes, then blending them in the food processor with a little rice milk and agave. I split the cashew cream into three containers and then mixed each flavor separately before freezing each one for 20 minutes and layering into a clear container. I don’t tend to follow recipes when I’m making ice cream, so I don’t have measurements to share, just the list of ingredients that I added to the cashew cream.
White Layer: Tahini Vanilla
Ingredients: Vanilla extract, tahini, rice milk, agave nectar
Orange Layer: Pumpkin
Ingredients: Canned pumpkin puree, coconut milk (carton), cinnamon, agave nectar
Yellow Layer: Ginger
Ingredients: Powdered ginger, grated fresh ginger, turmeric, coconut milk (can)
Tahini Vanilla was definitely the best flavor. It was super creamy with a sophisticated, nutty flavor. Ginger was kind of strange – like eating frozen Thai food. I would experiment with adding something fruity to this one.
And with no further ado…please join me in rocking out to Katy Perry:
One of the benefits of traveling for my “day” job is being forced to search out and try new places to eat. However, since I need to avoid gluten, dairy, soy, and a couple of other seemingly random ingredients, conducting copious amounts of research becomes a pre-travel requirement.
Before each trip I consult the Google search lords with terms such as gluten free, vegan, vegetarian, organic, and farm to table. In some cases I don’t turn up many results (see Anniston, Alabama and in others (see Portland, Oregon) I get so many that I don’t even have time to visit them all. Sometimes I even find a gem of a spot with dishes that, upon my return home, I try to recreate.
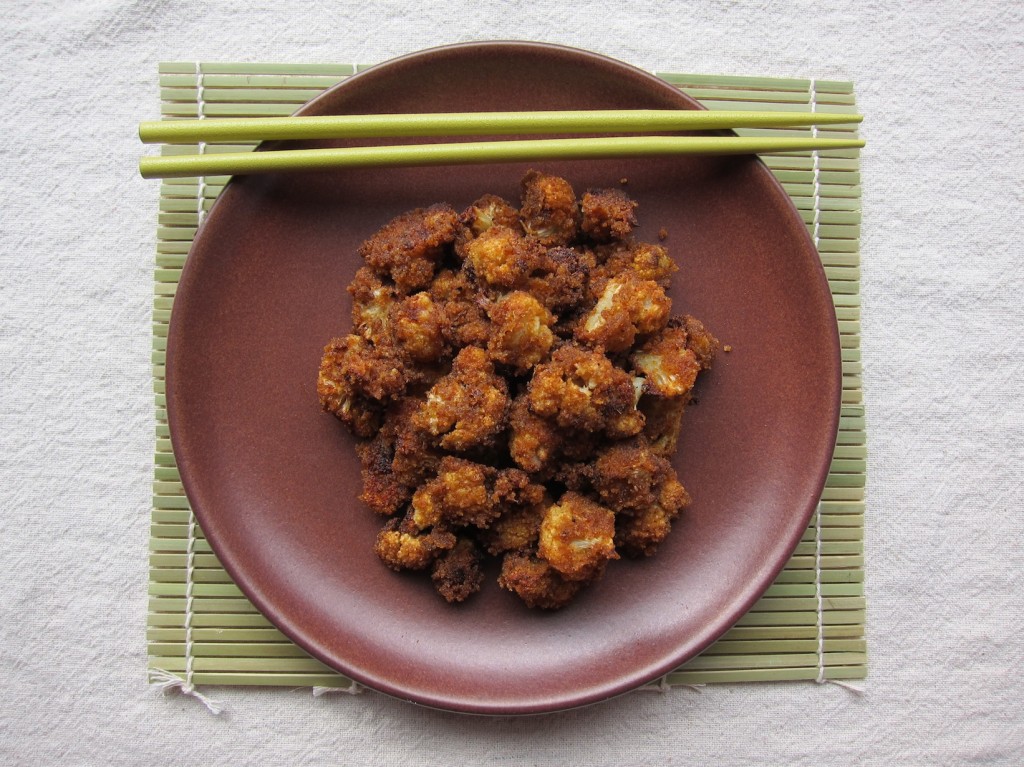
On one fine visit to San Francisco, in my new-to-gluten-free days (and pre-soy-free as well), I was invited to a birthday party at Betelnut. I called ahead and was enthusiastically informed that they had a gluten free menu and could easily accommodate my needs. So we went, ate lots of delicious food, and I immediately came home and worked to re-create the crispy cauliflower I had enjoyed there. After a couple years I’ve finally settled on my at home equivalent which happens to be both vegan and free of lots of common allergens.
Crispy Cauliflower
Ingredients
1 medium size head of cauliflower
2 tsp cumin
1 tsp garlic powder
1 tsp ginger
1 tsp paprika
1 tsp salt
1 tsp pepper
¼ cup gluten free & vegan rice crumbs (I used OrgraN)
¼ cup olive oil
Make
1. Preheat the oven to 375 degrees.
2. Prepare a medium baking sheet with a layer of parchment paper.
3. Wash and chop the cauliflower into pieces no larger than 1 ½ inches in size.
4. Place the cauliflower in medium bowl and toss with the olive oil. Set aside.
5. In a small blow, combine the spices and rice crumbs and whisk together.
6. Pour the spice and rice crumb mix over the cauliflower and toss with your hands until each piece of cauliflower is well coated.
7. Spread the coated cauliflower pieces across the parchment lined baking sheet.
8. Bake at 375 degrees for 45 minutes or until well browned and crispy.
9. Remove from oven and serve with gluten free tamari or for a soy free option use Coconut Aminos.
toppings
This post comes from the lovely Windy City Vegan… who just so happens to be celebrating her birthday today with some killer lookin’ pizza! Happy Birthday, Monika!
♥
It’s my birthday today and I want the perfect pizza crust for dinner tonight. Over the past few weeks much baking ensued! And once I got this crust figured out I just had to test it out for all three ways that my family eats their pizza – as a straight up traditional flat crust, fried-then-baked street food style, and my favorite, deep dish in a cast iron skillet.
Many, many, many pizzas later, I’m happy to report that this crust does an A+ job at getting it done all three ways.
As a birthday bonus I’m also throwing in my go-to roasted red sauce recipe. It’s a great way to make use of the oven while it’s preheating to 500 degrees, especially if it takes forever the way my behemoth convection oven does.

deep dish wedge
Pizza Crust
Yields 2 10-inch round crusts, 2 12-inch thin round crusts, 1 deep 8- or 10-inch crust, or several small personal-sized crusts.
{wet ingredients}
1 ½ C water, heated to 110 degrees
1 tsp sugar or agave nectar
1 packet (2 ¼ tsp) dry active yeast
1 T sunflower oil, or another oil with a comparable smoking point
…………….
{dry ingredients}
¾ C millet flour (loosely spooned and leveled, not scooped)
¾ C quinoa flour ( same as above)
½ C cornmeal (ground fine or course, your preference)
1 C tapioca starch
½ C potato starch
3 tsp xanthan gum OR 2 T ground flax or white chia seeds + ¼ C boiling water, mixed into a slurry
1 tsp fine grain salt
…………….
Additional oil for your pizza pans
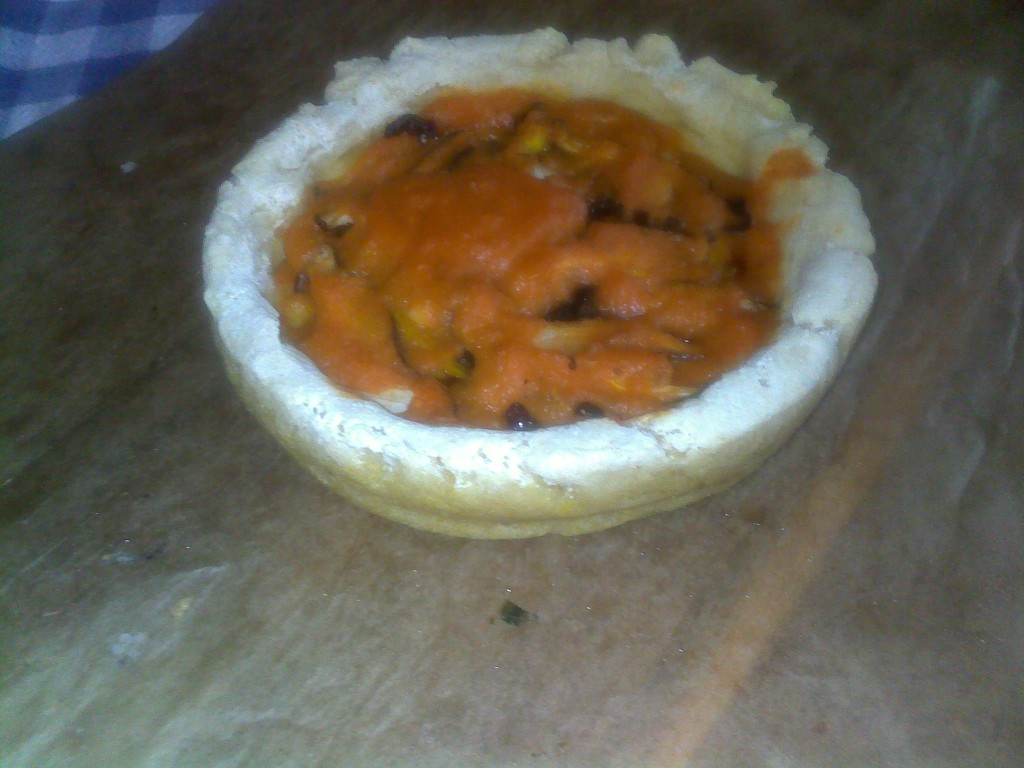
deep dish, out of skillet
Grinding the flours: If you’re a thrifty hippie like myself, then gather up your jars of quinoa and millet, a spice mill/coffee grinder, and get on it already! The measurements above are for flour. I have no idea how much of each grain you need to get ¾ C of flour (although I think it’s pretty comparable).
Proofing the yeast: Combine the wet ingredients including the yeast, whisk to combine taking care that yeast fully dissolves, and set aside for a few minutes.
Mixing the dry ingredients: Sift all of the dry ingredients together in a large mixing bowl. If using a slurry instead of xanthan gum, DO NOT add it yet.
Mixing your dough: Make a well in the center of your dry ingredients and add the yeast mixture. If using the slurry, add this as well. Use a large spatula or mixing spoon and thoroughly – but quickly – mix everything together. A nice, cohesive ball of dough will form within a minute or so. It will be wet and a little sticky; it should not be runny. Add additional water or flour if needed, a tablespoon at a time. Let the dough rest for about five minutes in the bowl.
Saving dough for later use: If you aren’t going to use some/all of the dough right away, put the dough into an airtight bowl and store it in the fridge. When you’re ready to use it, let it sit out at room temperature for 90 minutes before proceeding.
The one – and only! – rise: That’s right, yeasted gluten free dough only needs one rise. Lightly oil your pizza pan or pans, divide your dough accordingly, and using lightly oiled fingers, carefully press it out into the pan or pans. Cover loosely with a towel and let the dough sit for 30-60 minutes in a warm area while the oven preheats; the dough won’t double in size, but it will puff up nicely. FYI, your dough will rise perfectly fine in a cool area, too – it will just take longer.
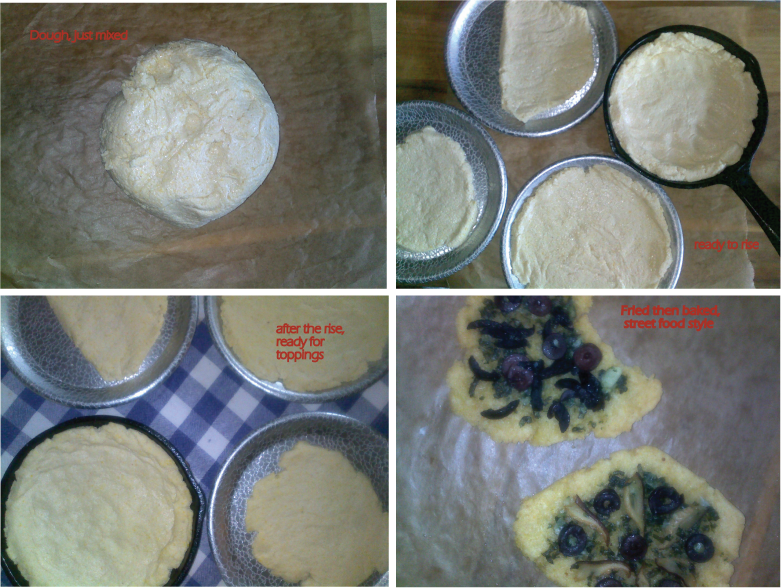
Preheating the oven: Preheat your oven to 500 degrees and move a rack into the bottom position (unless you put your pizza pan directly on the bottom of your oven, which is what I do). If you have a baking stone, place it on the bottom rack/bottom of the oven to preheat with the oven. Also, if you’re making your own sauce this is a great time to roast it up! A recipe for roasted red sauce is at the end of this post.
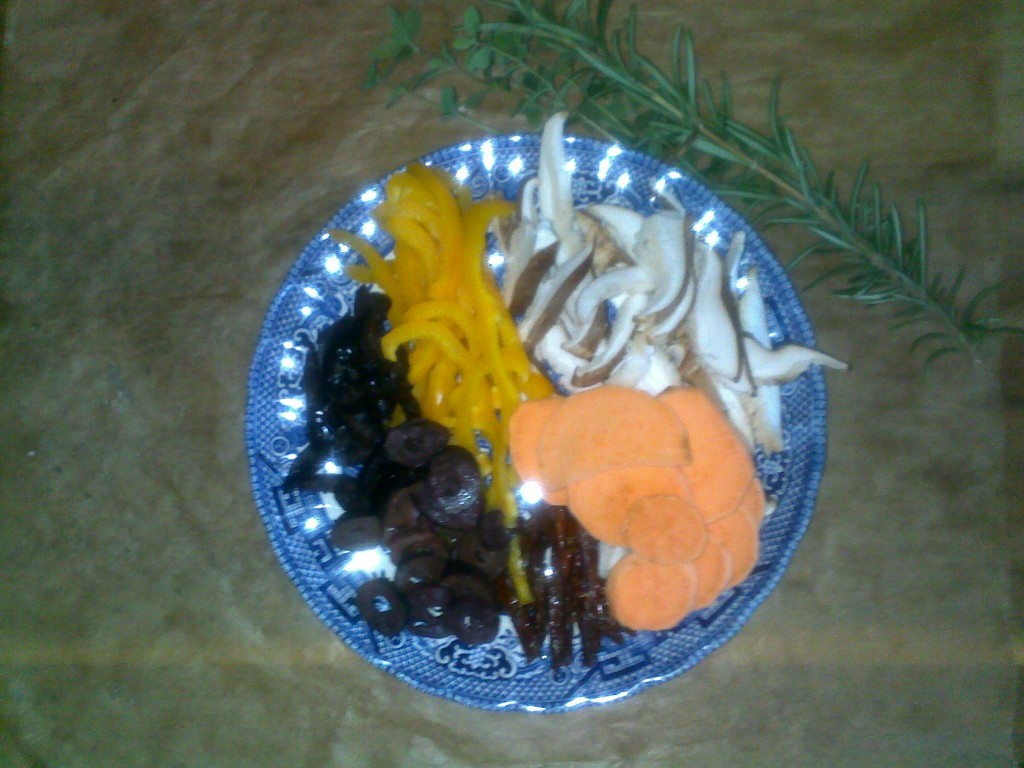
mise en place
Prepping and baking your pizza: Set everything out mise en place, and as soon as your oven is ready, dress your pizza. Quickly open the oven door and slide your pizza pan into position. Bake for 15 minutes, or until crust is just starting to brown.
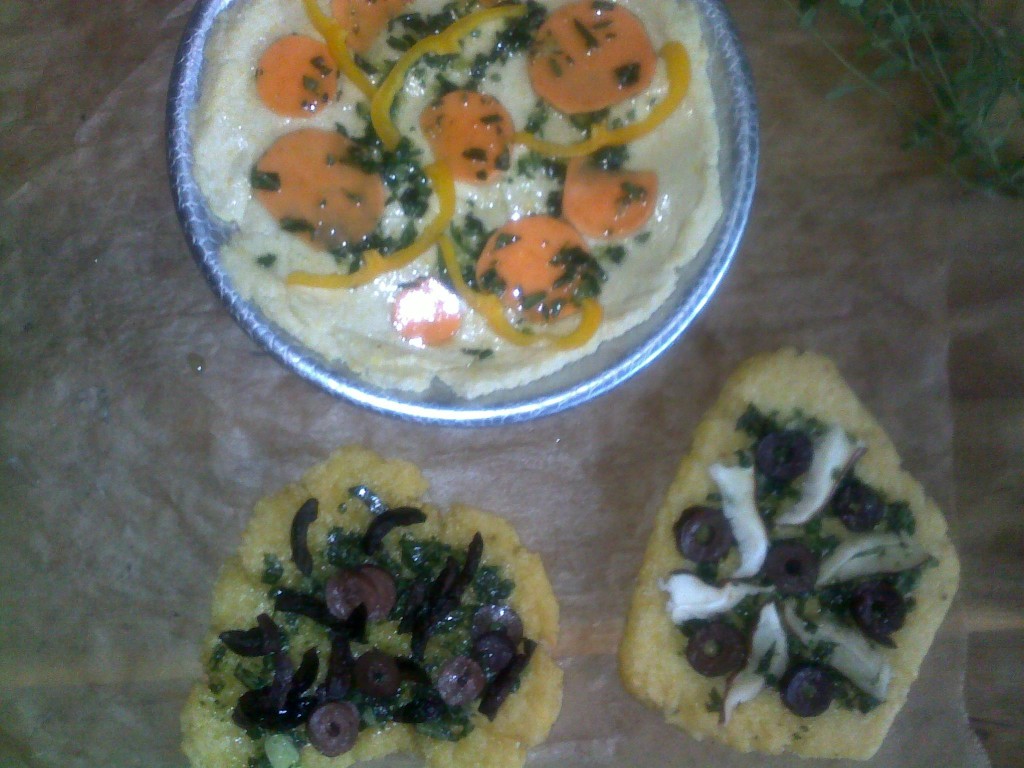
pizzas, prepped
Street food style pizza: While oven is preheating, heat a lightly oiled cast iron skillet over high heat. Pat a piece of dough out to ½ inch thickness and lightly oil on both sides. When pan is hot, quickly sear the pizza dough for 30 seconds or so on each side. The dough will lightly cook on the outside, but will still be soft inside. Proceed with the step above, but reduce baking time to 10 minutes.

thin crust, baked, cross section
Bonus Recipe!
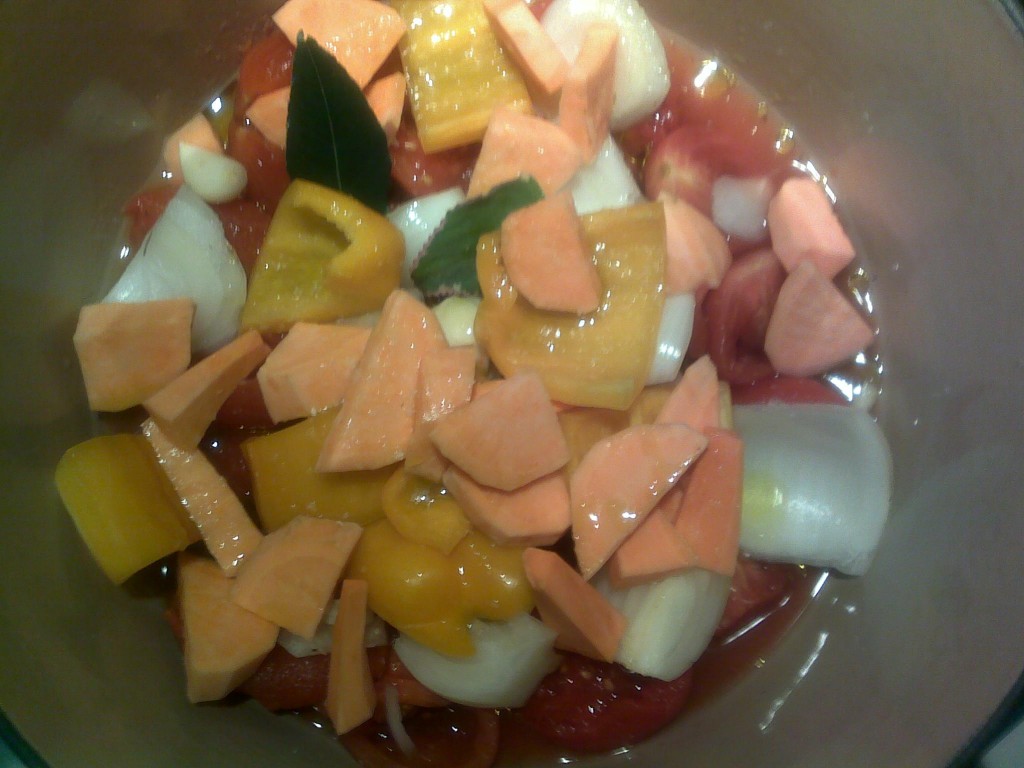
ready to roast
Roasted Red Sauce
Below are what I usually put into my sauce, but you can use whatever you have on hand.
10-12 roma tomatoes, OR a 28 oz can of whole or crushed tomatoes, drained
2 T brown sugar
1 large onion, cut into inch-sized chunks (white, yellow, red – your choice based on taste preferences)
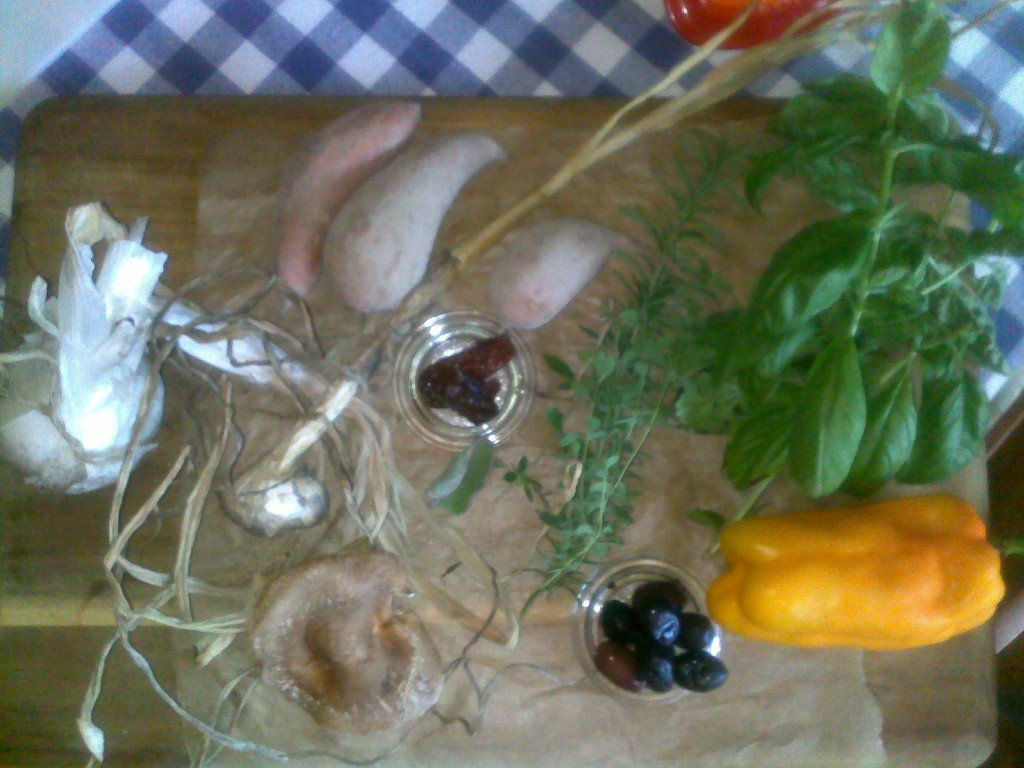
2-3 small sweet potatoes, peeled and cut into chunks
1 large sweet bell pepper, seeded and cut into chunks
2 fresh bay leaves
1 large Cuban oregano leaf
Scant amount of quality olive oil
Get out a nice, heavy Dutch oven or roasting dish. Cover the bottom of the pan with the halved romas, cut sides up, and sprinkle with sugar. Next, layer the onion and garlic. On top of that, layer the root vegetables, squash or sweet potatoes and peppers. If using any herbs, tuck them in between the layers. Drizzle a few drops of olive oil over the top layer.
Place pot into the cold oven and then roast for 20-30 minutes while the oven preheats for your pizza. When everything looks nice and is starting to brown, remove your pot from the oven. Remove bay leaves and anything else you may have added that will not be in the finished sauce. If you have a stick blender, puree everything right in the pot. If not, ladle the vegetables into a blender or food processor and blend in batches (let cool a little first if you’re ladling it into plastic). Season to taste and you’re good to go!
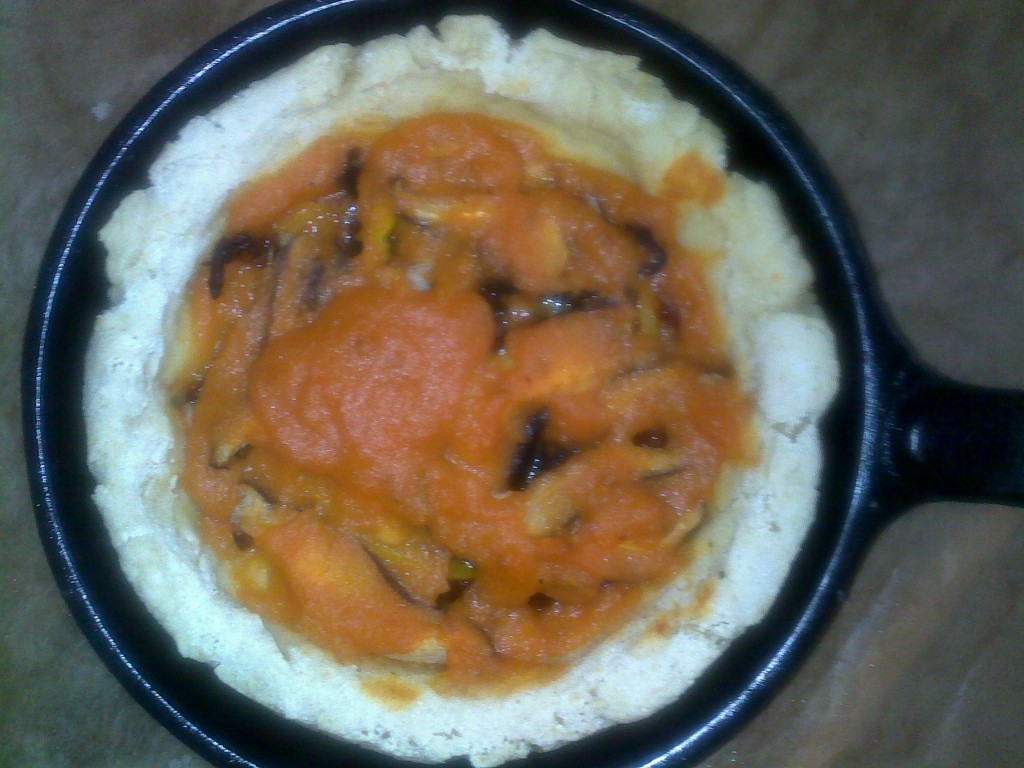
deep dish, just baked


This is Halloween, this is Halloween. Halloween, Halloween!
Hi everybody, it’s Kristina again from spabettie, and I am here with a post themed on my favorite holiday. I have a few recipes to share, a cute pup, and some other fun shenanigans. A big thank you to the xgfx girls for having me here again!
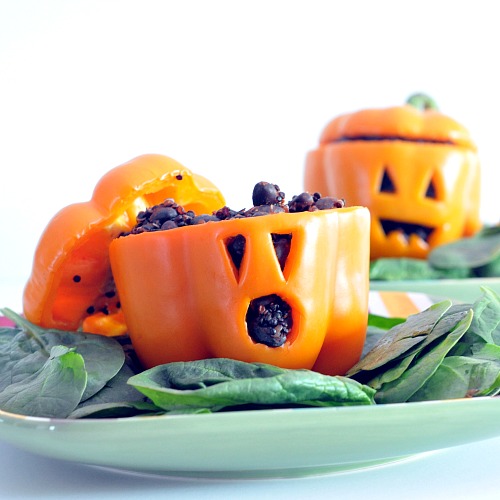
Using the black quinoa is perfect for a jack o lantern.
First up, my carrot-ginger quinoa pepper jacks! These pepper jacks are always a big hit with everyone, and this year I am even more excited about the filling inside – a carrot ginger quinoa, and it’s SO good!
This next one was all I needed last year for dessert on Thanksgiving. Couldn’t wait to make it again. Good thing the nog is back in shops already…
From one pumpkin patch to another,
 Crispy Treat Pumpkin Patch (orange cardamom flavor).
Sometimes the spiders around here are big enough to scare the cats…

and that ice cream up there?

Makes these: Pumpkin Milkshakes!

My dachshund Basil loves Halloween, too. He is a turtle this year, and last year he was…
This time of year we just call him our Halloweenie. Now back to those pepper jacks. I let out a loud squeal when I found out that Pee-Wee Herman shared them!
I was pretty excited (I love Pee-Wee…) and have to admit I did his laugh a couple times when I saw this. ;) and the other fun thing that is happening with these pepper jacks right now… 
These pepper jacks are a finalist in the Yummly Halloween recipe contest, and I would really love it if you helped a vegan and gluten free recipe win!! How cool would that be?
All you have to do is visit the site here and “like” the page. No signing up for anything, just “like”. I thank you in advance, and I hope you all have a Happy Halloween!
Are you a Pee-Wee fan? What about dogs in costume?
*****
]]>*****************************************************************************
My name is Camille, and I am serving in the Peace Corps in Northern Senegal, West Africa. I live in a very small village where my diet consists of rice, millet, and leaf sauce. When I do get a chance to go to the big city and hang out at our regional house, we still have very limited food options. So when a new store opened up featuring a lot of hard to find items (such as chickpeas and tortilla chips) we jumped for joy! Among the many gems, we happened to stumble across plantains.
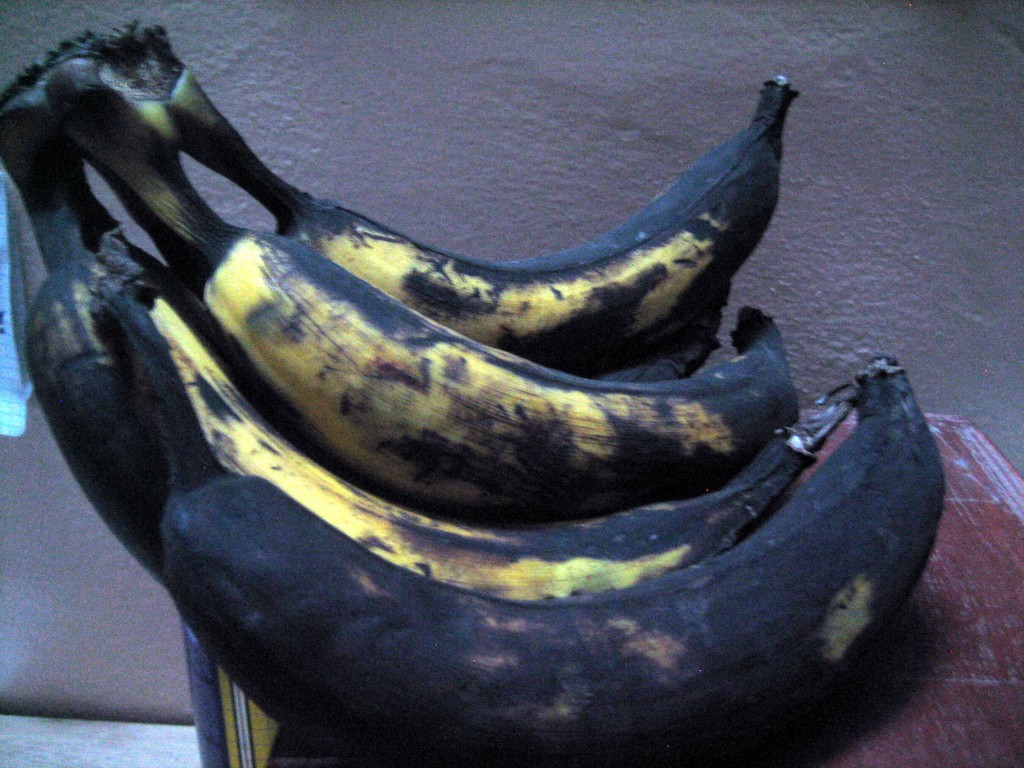
For those of you who may not know, plantains are a tropical fruit that strongly resemble a banana. However plantains are much larger than bananas, and need to be cooked before eating. Additionally, plantains start out green (like bananas) but are not fully ripe until they are black. They are eaten as a staple food in many tropical areas of the world, and can be boiled, steamed, or fried.
I have a special place in my heart for plantains ever since I chanced upon them at a Caribbean restaurant in Cape Cod years ago. Then recently our local health food store started stocking Inka Plantain Chips, which with only three ingredients (plantains, palm oil, and salt) quickly became my favorite quick snack.
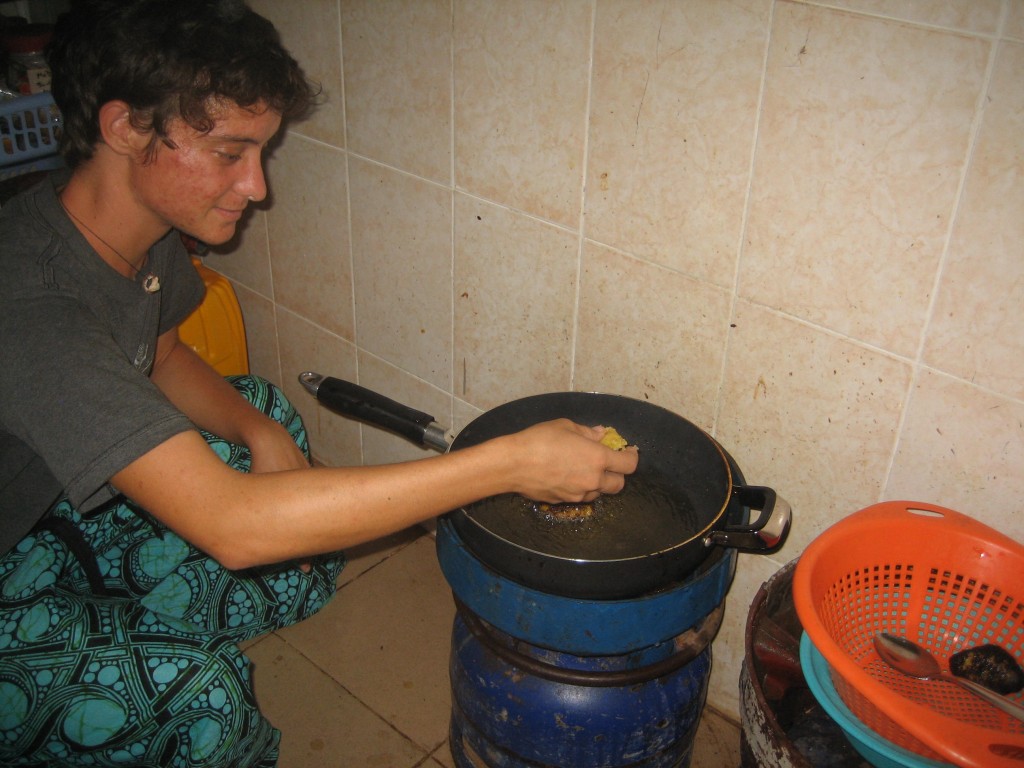
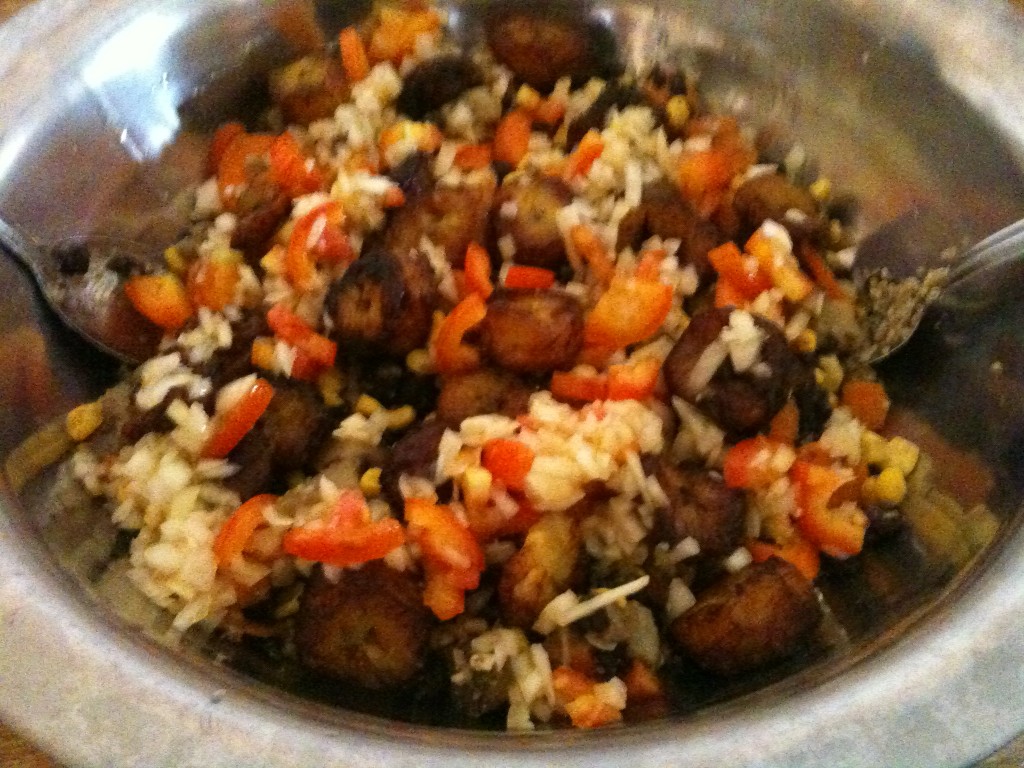
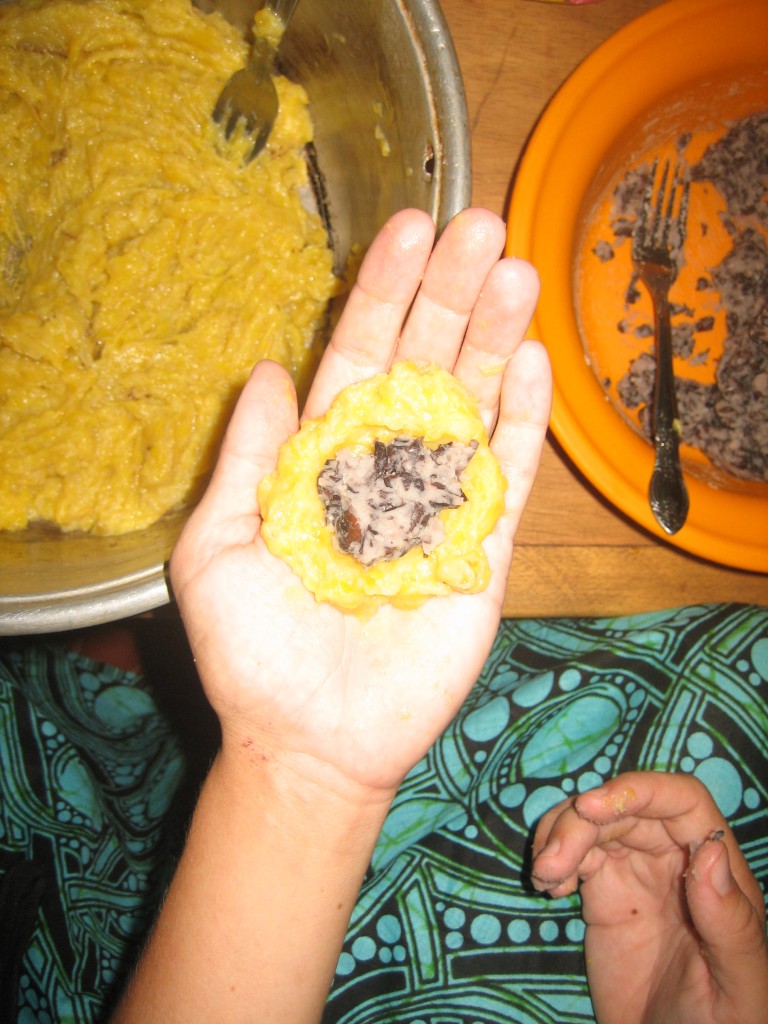
There seem to be an endless variety of ways to cook this amazing plant. Last week, my friend Rachel and I experimented with this recipe for Plantain Patties Stuffed with Black Beans and loved it!
It works best when you have plantains that are yellow with some black. Also, I found I enjoyed these the most when it seemed as if we had burnt them. It sounds weird, but if you get them fully black on both sides when you fry them they end up tasting nice and sweet. Golden brown was good too, but it almost tasted a bit uncooked.
Here are some pictures of Rachel making the patties:
My favorite, and the most simple way to cook plantains, is to wait until they are completely black and almost mushy and then fry them. All you do is peel the plantain and cut into ½ inch pieces. Then heat up oil (enough to generously cover the pan) and fry them. When frying, the plantain will turn a deep yellow and puff up a little when it is ready to flip. Be patient, it will take a while and then suddenly they will all be ready to turn at once. Again, if you end up ‘burning’ them, it actually tastes pretty good. Drain, add salt, and serve.
Fried plantains are good alone, but also make a great addition to stir fries. Try combining sautéed onions, garlic, carrots, corn, and black beans with raw tomatoes, cilantro, and fried plantains. Sprinkle with a lime and serve over quinoa for a easy, tasty, and healthy meal.
]]> Hey Folks! Today’s post is written by Laurie Sadowski from Whisking & Running (and Running)! Thanks so much for your contributions this month, Laurie!
******
I don’t know about you, but it sure is getting chilly where I’m from. It’s that transitional three or four weeks where it isn’t too cold yet (still hovering around 10 degrees), but considering it was over 25 degrees two weeks ago, our bodies are just a little… confused. I live in the type of area where we go from flip flops to cozy boots in a matter of days. There definitely isn’t a true “fall” here, in my opinion.
It also is that time of year when I briefly hate running. I run most days of the week but when we’re hit with sudden chilliness, I usually spend my runs wondering why I choose to do this. It is my choice to get out each morning with my running shoes on… but why? Wouldn’t I rather be in bed, drinking tea, and swiping through my Flipboard? Yes, yes I would. In fact, I’ll probably be thinking that tomorrow morning when I wake up and then be off to running in a half-marathon with my warm winter running clothes. I really thought it was going to still be 25 degrees when I signed up for this!
But then I am done and I feel great that I went and my body and mind feel better, my body temperature is higher, and I get to fuel myself with extra treats (just kidding).
So this brings me to fuel and being a “gluten-free vegan” (also known as “what can you eat?”).
I’ve been asked this a lot, and chances are if you’re gluten-free OR a vegan OR both you have been too. After all, there’s hardly anything left when you cut out wheat, oats, barley, rye, meat, dairy, and eggs, right? Hardly any fruits, vegetables, grains, legumes, nuts, seeds, and other awesome stuff, right?
Wrong!
Having to answer this question over and over (and over) led me to write a book. At first it was a huge book, but then my publisher split it into three – a series. They called it The Allergy-Free Cook, and split it into Breads, Cakes and Cookies, and Pies and Desserts. I’m super excited because the first one just launched, and the second one is nearly done refining.
And it answers the question of what we can eat.
The reason I bring this up is because one of my favourite fall meals is soup, stew or chili with something bread-like. Cornbread. Scones. Garlic bread. Crackers. And everything in between.
Oh, breadsticks…. and breadsticks. Garlic ones. Or pumpernickel! (I’m shamelessly plugging my book – I’m sorry. This is exciting for me).
So I’m delivering you a warm, comforting dish, a simple soup to put together, served warm with some soda bread slathered with roasted garlic hemp, avocado, or olive oil.
Roasted Carrot Ginger Soup
- 5 cups carrot chunks (about 5 large)
- 4 cups sweet potato chunks (about 5 medium)
- 2 tablespoons extra-virgin olive oil
- 1 small onion, finely chopped
- 2 to 4 cloves garlic, minced (to taste)
- 1 (2-inch/5 cm) piece fresh ginger, peeled and finely chopped
- 4 cups water, plus more as needed
- 1/4 teaspoon turmeric
- Pinch ground nutmeg
- Pinch ground cinnamon
- Sea salt and fresh ground pepper to taste
- 1/4 cup creamy roasted cashew butter
- Preheat the oven to 400°F (200°C). Put the sweet potato and carrots on a lightly greased baking sheet. Roast for about 40 minutes, until softened and beginning to brown.
- Meanwhile, heat the oil in a large saucepan over medium heat. Add the onion and cook until softened, about five minutes. Add the garlic and ginger, and continue to stir until fragrant. Add the water, turmeric, nutmeg, cinnamon, salt and pepper, along with the potatoes and carrots. Bring to a boil and reduce to a simmer, letting cook until potatoes and carrots are completely softened.
- Using an immersion blender, puree until smooth. If you don’t have an immersion blender, use a heat-safe food processor or blender. Add additional water, a little at a time, if too thick.
- Stir in cashew butter, mixing until dissolved. Season with additional salt and pepper to taste.
Makes four servings.
—-
For more information on the book, including a recipe list, sample recipes, table of contents, and more, please see this part of my website. You can also contact me for more info or if you’d like to be a recipe tester for book 3 or the tail-end of book 2.
]]>♥
Hi folks – I hope you are bundling up during these cooler days of autumn. Today, I wanted to discuss potlucks, specifically raw vegan potlucks. Potlucks are a fantastic way to establish a sense of community, get to know your neighbour(s), and share in the abundance of healthy, plant-based food.

A few months ago, I was approached by my newfound friend Lee from Truly Organic Foods about organizing a raw vegan potluck meetup group in our area. I’d had the opportunity of attending some amazing vegan potlucks, but had never attended a raw vegan potluck before.
Little by little, Lee and I discussed ideas about possible venues and ways to connect with others who shared our interest in healthy, raw vegan food. Sure enough, there were many others out there who were also looking for a raw vegan potluck.
For our first potluck, held at a local eatery in April of this year, we had about twenty fantastic people in attendance. Each month, we expanded in numbers, and eventually took our potlucks outdoors for a backyard meetup during the summer months. Recently, we relocated to our third venue to accommodate the larger numbers (now between forty to fifty people!).
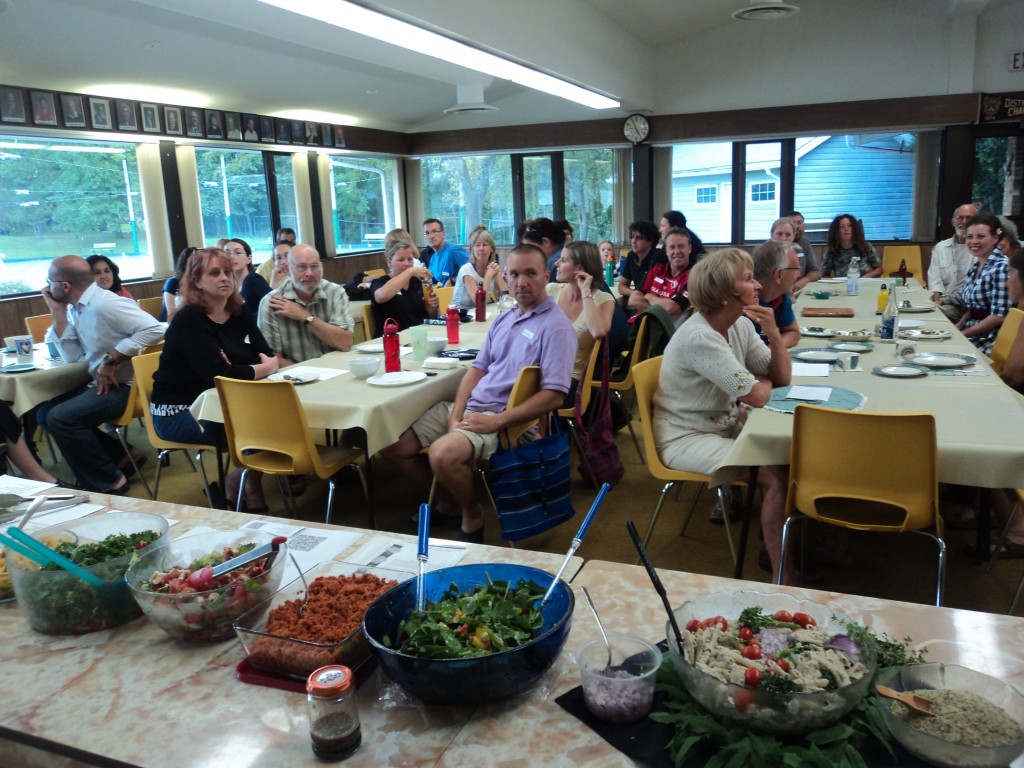
The premise for the potluck is simple: bring a raw and vegan dish (a recipe that only uses 100% raw, uncooked and plant-based ingredients) to share with about 4-6 people. People are also encouraged to bring a copy of their recipe to share with the group. We also try to upload the recipes online so people can access them afterwards.
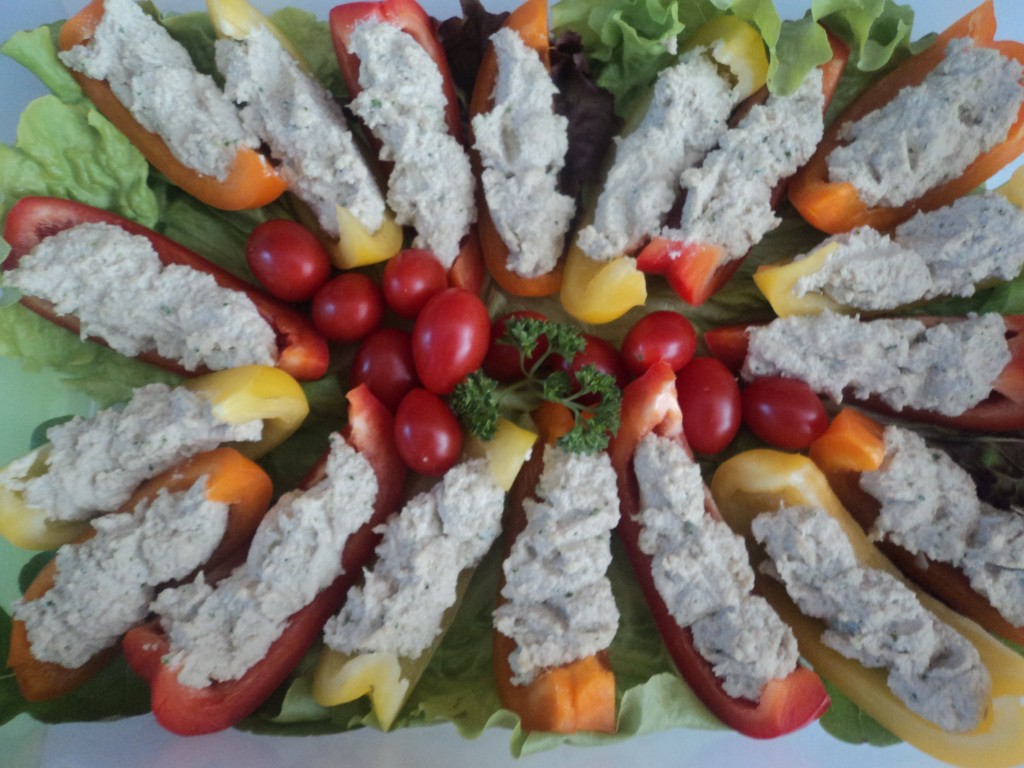
The food is simply out of this world, unbelievably delicious, and I feel honoured to be surrounded by such talented cuisine artists each and every month. The enjoyment, love, and positive energy that everyone brings to these meetups is what keeps bringing me back month after month. Also, some of the best meals of my life have taken place at our gatherings – the following are just some examples of the inspiring rawesome dishes that grace our communal table:
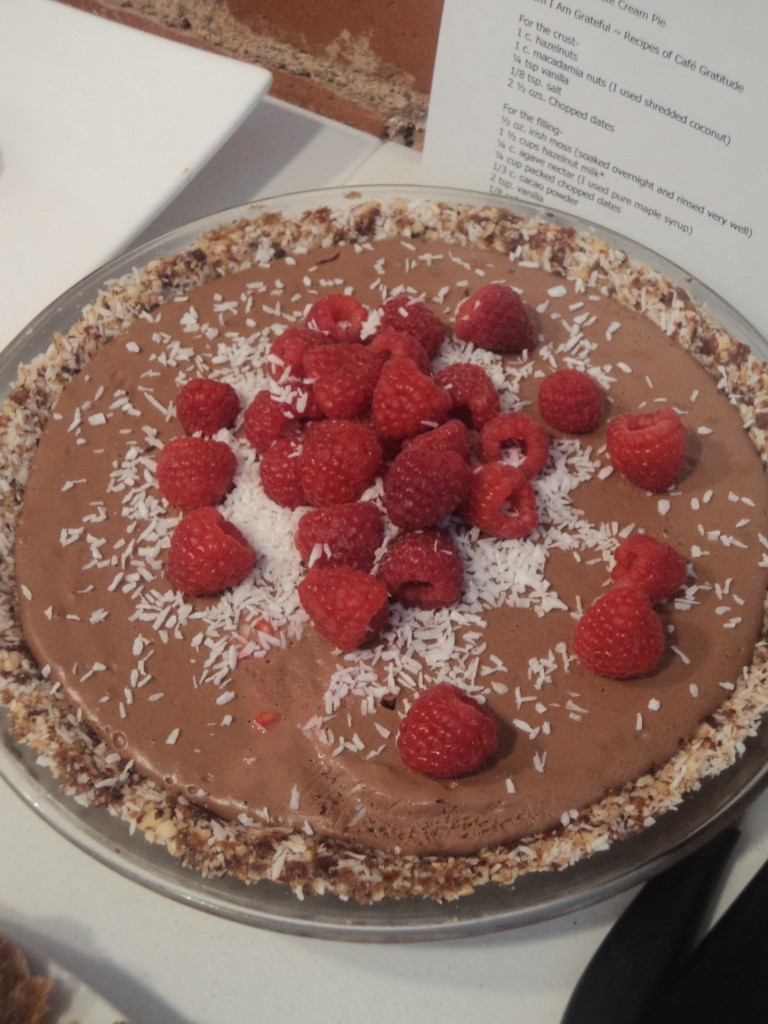
Chocolate Raspberry Cheezecake
Creamy Kelp Noodles
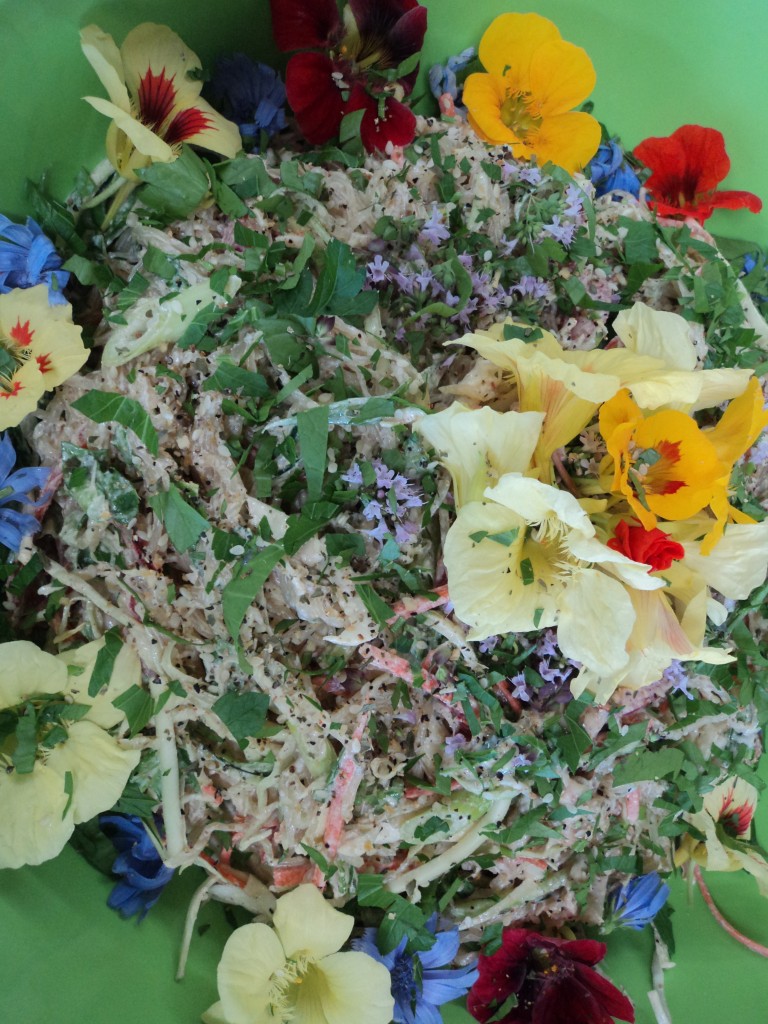
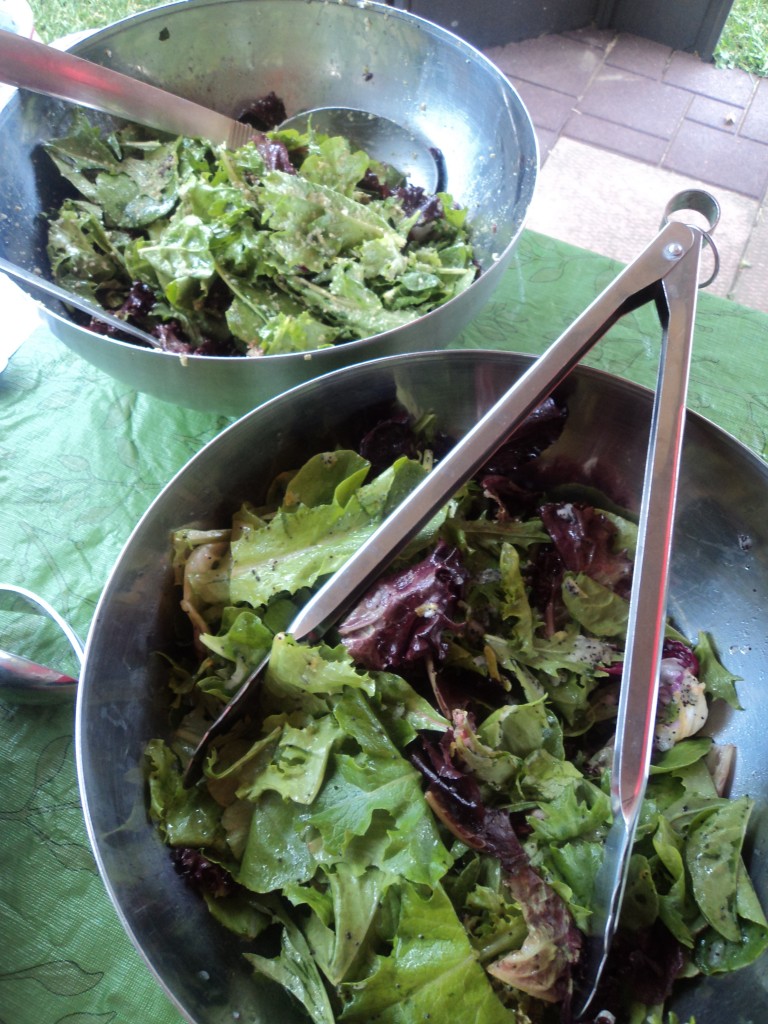
Sumptuous Green Salads
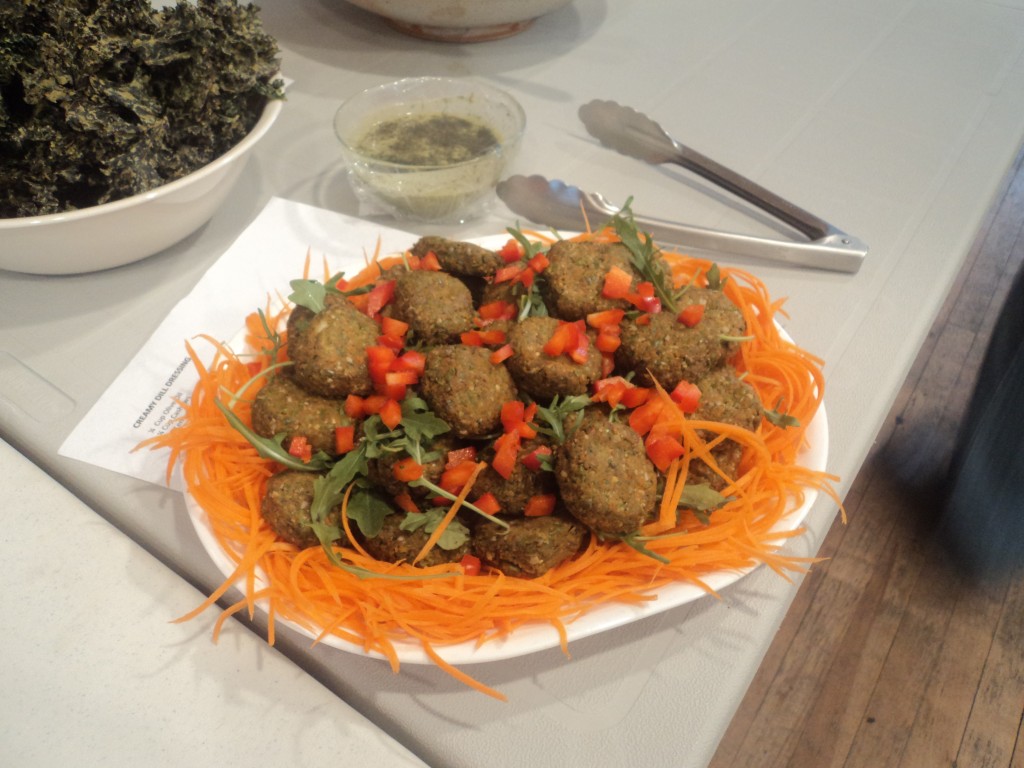
Falafels
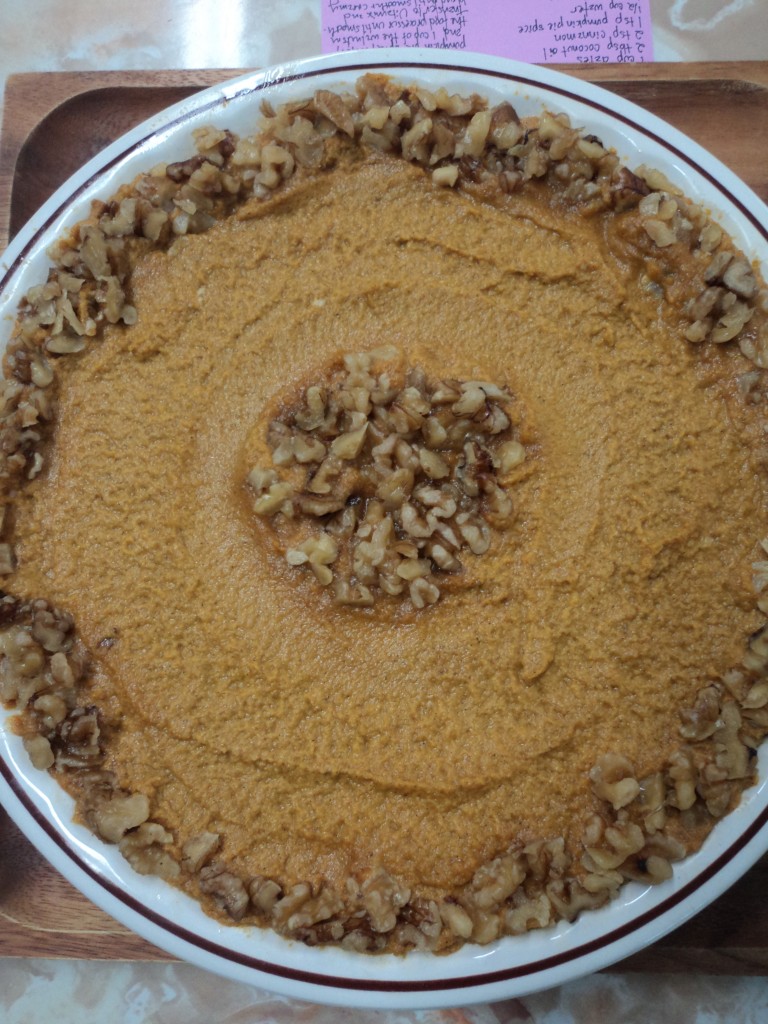
Sweet Potato Pie
Thinking about starting your own meetup group? Here are a few tips to get your motors running towards organizing your very own potluck:
1. Seek out like-minded foodie folk: This might seem like a given, but try to connect with others who are interested in plant-based, healthy food. Is there a similar potluck group already in your area? If so, see if you can help their group, or have a themed evening based primarily on raw vegan foods. In terms of venues, see if there are any local halls that are available to rent, or even start out in someone’s home to save money.
2. Plant the seed and communicate: Get the word out about your group online, in person, or through word of mouth. Print media (posters, little leaflets or cards) that advertise the potluck can be handed out to local health businesses, at universities, or farmers markets. Remember to indicate the time of the potluck, and outline any information attendees will need to know.
3. Organize the community: This can be done using social media tools like Facebook and Meetup (the latter does require a yearly fee to use the website). This way, you can put out monthly reminders about the potluck, and have an idea of who will be attending based on the number of RSVP’s.
4. Think about potential guest speakers: Guest speakers add a wonderful flair, and can help to spark an engaging discussion about a health topic. In the past, we have had talks from yoga instructors, a recipe demonstration from yours truly, as well as people sharing their health journey. We’ve even screened some health-related films.
5. Get ready for the first potluck: Remember, introductions are key. Nametags are a great way of connecting people together and to get them talking about the wondrous food they are about to enjoy. It can be beneficial to have the organizer’s introduce the dishes so enough attention is paid to the time and effort of everyone’s contributions.
Have fun and enjoy!
]]>
